Manual: Cyberpower K2 Skorpion keyboard

https://www.cyberpowerpc.com/page/Skorpion-K2/

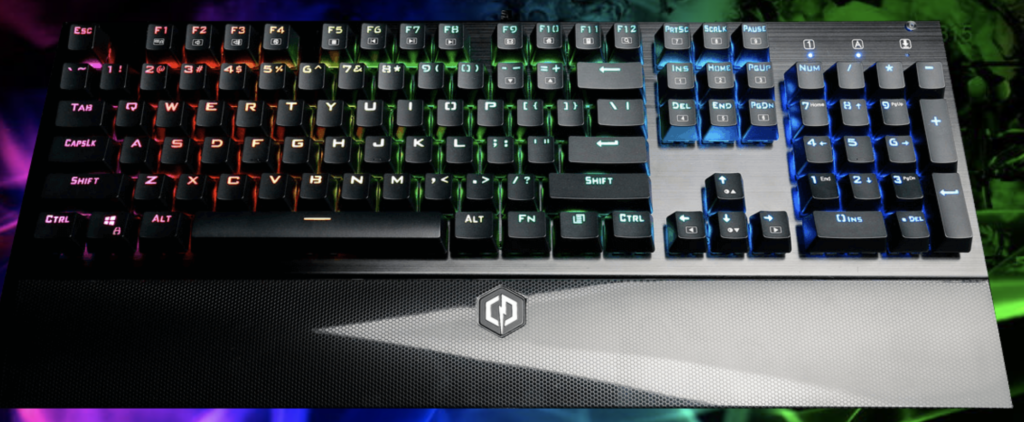
RGB settings

fn + <key> | each one is a different setting

  • PB = sinusoid
  • SL = rainbow circle expanding outward (fn+left/right inverses direction)
  • PS = rainbow snake around keyboard
  • Ins = whole color rainbow
  • HM = exploding from key presses
  • PU = rainbow sinusoid across keyboard
  • Del = rainbow lines across keyboard (fn + left/right reverses direction)
  • End = preset color colors (fn+end to start edit mode, cycle through key colors, fn +end to exit edit mode)
  • PD = single color fading keys

speed up effects
Fn + plus/minus key

brightness
Fn + up/down

How To: Fix Asus router disconnecting Spectrum/Charter

Frequently my Asus router disconnects and loses signal and it takes a while to actually regain signal and sometimes I have to power cycle the modem. I had no idea why until recently I accessed the router admin page and saw that the internet section said: Your ISP’s DHCP does not function properly so I google around and realized that Asus routers have a DHCP Query Frequency setting and the default is “Aggressive“. Spectrum being the POS that it is sounds like it blocks the device from getting an IP address from too frequent polling. So I switched that setting to “Normal” as the suggestion on the links below and it appears to have fixed the problem!

Sources:
https://www.snbforums.com/threads/so-what-is-the-point-of-aggressive-dhcp-query-frequency.11738/
https://www.geekyramblings.net/2019/01/21/your-isps-dhcp-does-not-function-properly/

How to: Select a replacement power adapter for your electronics (e.g. for an Asus router)

Every once in a while I find a nice cheap ASUS router without a power adapter, hunting for the specific adapter that came with the router can be a pain and often times power supply prices are unreasonable. But it’s not necessary to buy the exact same one so you can find a much cheaper power supply. Here I will describe how to find a matching power supply for your router

Take a look below for a list of power supplies for ASUS routers, and if there is one missing send a comment and I’ll update it!

Read more

How to: Fix Microsoft Sculpt Mouse left button

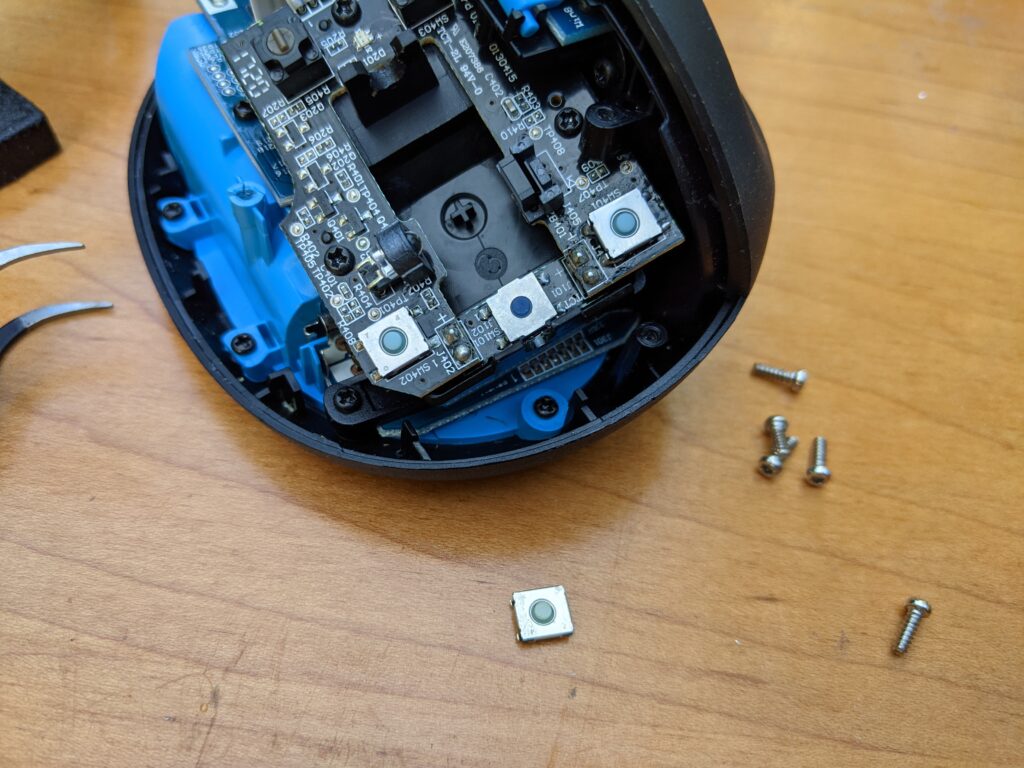
I was sold a faulty mouse where the left button registers some of the clicks but not all. The seller refunded me my money but didn’t want me to return the keyboard to save on expenses. I disassembled the mouse and two screws were loose, so I suspect that the seller knew the mouse was faulty and tried disassembling it and sold it instead hoping the buyer wouldn’t catch it… tsk tsk…..

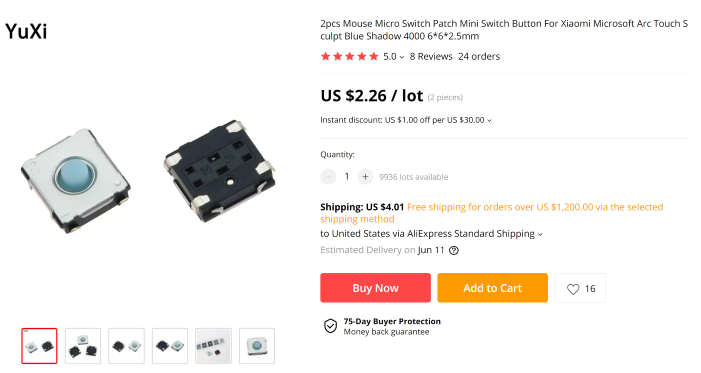
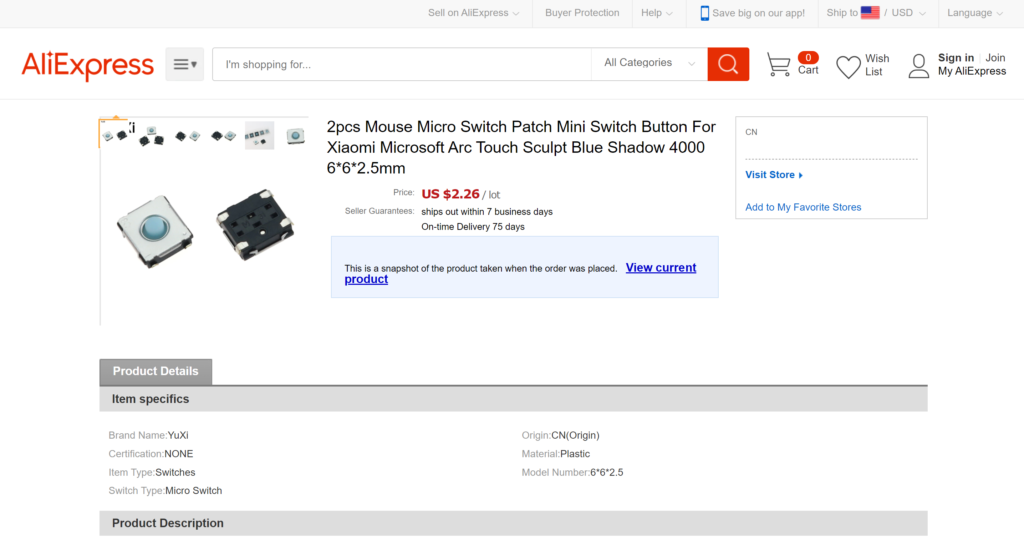
Upon disassembling the house further I saw that the type of switch that it needed. I was able to find it only on aliexpress. I measured it to be roughly 6x6x2.5mm so that is the part I ordered. It is advertised for a different microsoft mouse but probably was also used on the sculpt.

I’ll to put together a video of this repair when it arrives.


https://www.aliexpress.com/item/1005001949056219.html?spm=a2g0s.9042311.0.0.729e4c4dyx3i16

How To: Host Virtually Jackbox Games using Google Meet (with audio!)

Since the pandemic started, I’ve hosted virtual board games like jackbox game nights every Tuesday through google meet. After the first night hosting, I realized that google meet does NOT share pc audio for others to hear. People missed out on the goofiness of the jackbox games. By the next night, I was able to figure out a way to share the audio, which although a bit clunky it’s worked well.

You will need:

  • A laptop/desktop with the game
  • A phone

Setup overview

  • Laptop/Desktop
    • Jackbox Game Instance
    • Google Meet –> Video feed
  • Phone
    • Jackbox Game Controller
    • Google Meet –> Microphone feed

PC Setup

Step 1) Setup PC to share audio (using Stereo Mix) and Jackbox game

  • At the bottom right of your taskbar, right click on the speaker icon and select sounds

  • Click on the Recordings tab
  • Right click a blank area and press Show Disabled Devices

  • Look for the one that says Stereo Mix and enable it

  • Now Right click on Stereo Mix and make sure Listen to this device is checked off (not sure what this does exactly but that’s how I have it)

Step 2) Change Google Meet Call inputs to use Stereo Mix

  • Launch a new google meet call by going to https://meet.google.com/
  • Click on the three dots at the bottom right and select Settings

  • Now under AUDIO you should see Stereo Mix as an option, select it.
  • Whenever you want to share your pc audio change the Audio setting to Stereo mix and when you want to use your mic change it to your microphone.
  • Note: You can’t share both at the same time, and people won’t be able to hear you when sharing audio through Stereo Mix

You can now Share Window and select the window with the jackbox game.

You should now be:

  • 1) Sharing the audio from your computer
  • 2) The jackbox game window
  • 3) Your webcam from your pc if you chose to

Phone Setup

  1. Join the Google meet call on your phone
    1. Turn your video off
    2. Turn your mic on
    3. Keep the call in the background. In Android: press the back button or fling your finger upwards from the bottom
  2. Join the jackbox game
    1. Open a browser and go to jackbox.tv and join the game by inputting the code

Note: Having the call and the game going will drain your phone battery rapidly so make sure you keep your phone powered!

You should now:

  • 1) Be sharing your voice to the google meet call through your phone
  • 2) Able to play the game through your phone

If you’ve made it this far you are ready to have an awesome time with friends! I hope you found this helpful and stay safe!!
How To: Share PC Using Google Meet (Win 10)

I regularly host jackbox game nights using google meet and after the first night trying it out I realized that there was no easy way to share pc audio with others. Doing some research led me to the steps below which although a little clunky worked well. Some people have had luck using “Share window” and it also shares the window audio but that was not my case. I’ve listed below links to sources where people discuss this same issue. Some people have had luck using VB-Cable but this guide doesn’t show you how to use that.

Step 1) Enable “stereo mix” on your windows pc

  • At the bottom right of your taskbar, right click on the speaker icon and select sounds

  • Click on the Recordings tab
  • Right click a blank area and press Show Disabled Devices

  • Look for the one that says Stereo Mix and enable it

  • Now Right click on Stereo Mix and make sure Listen to this device is checked off (not sure what this does exactly but that’s how I have it)

Step 2) Change mic input on Google Meet Call

  • Launch a new google meet call by going to https://meet.google.com/
  • Click on the three dots at the bottom right and select Settings
  • Now under AUDIO you should see Stereo Mix as an option.
  • Whenever you want to share your pc audio change the Audio to Stereo mix and when you want to use your mic change it to your mic.
  • Note: You can’t share both at the same time, and people won’t be able to hear you when sharing audio through Stereo Mix

Sources:

  • https://www.reddit.com/r/jackboxgames/comments/flutlz/google_hangouts_plus_quiplash_quarantined_fun/?utm_medium=android_app&utm_source=share
  • https://support.google.com/meet/thread/23407453
  • https://support.google.com/meet/thread/36010293?hl=en
  • https://www.reddit.com/r/jackboxgames/comments/fl6tsn/screen_sharing_with_audio_via_google_hangouts_or/?utm_medium=android_app&utm_source=share

How To: Fix Spyder gui terrible scaling with high dpi monitor (Windows 10)

I recently upgraded my monitor to 4k and the first thing I realized was that spyder scaled horribly, tiny text along large icons etc. This appears to be a problem with qt as me and others have managed to fix this by modifying the qt.conf file as below. There is a closed issue on github with a recent post.

https://github.com/spyder-ide/spyder/issues/4316

Sources:
https://stackoverflow.com/questions/35854289/spyder-interface-icons-very-small-on-high-resolution-screen-in-windows-10

1) Locate the qt.conf file

Where is the qt.conf file?

If you installed as admin ( and meant for all users )
C:\ProgramData\Anaconda3\
If you install as a normal user
C:\Users\User-Name\AppData\Local\Continuum\Anaconda3
or here:
C:\Users\User-Name\anaconda3\

Source: https://stackoverflow.com/questions/37117571/where-does-anaconda-python-install-on-windows

2) Modify the qt.conf file

In order to modify this file I had to first copy it to the desktop, modify it then replace it on the C: drive. Add the following lines to the file. Change to 0 or 1 depending on your display

[Platforms]
WindowsArguments = dpiawareness=0

3) Restart Spyder

In order for changes to take effect you will need to close and restart spyder. If that didn’t work for you change the value to a 0 or 1

How To: Fix missing “At a glance” widget not showing the weather.

Problem: Androids “at a glance” widget doesn’t show the weather

Solution: Uninstall and reinstall updates to the “Google” app

  • Go to:
  • Settings
  • Apps & Notifications
  • “See All __Apps”
  • Find the “Google” app
  • Click on the 3 dots (top right corner)
  • Click on Uninstall updates (as soon as I did this the weather app came back)
  • Reboot phone
  • Update Google app

Source: https://www.reddit.com/r/GooglePixel/comments/afmqo4/solved_missing_weather_in_at_a_glance_widget/

How To: Make flash cards using Microsoft Word and Excel

I’ve been trying to figure out how to do this for a while and now that I finally figured it I thought I’d document it 🙂 Hope someone finds this useful! Also a great way to print out cards for board games on both sides This may seem like a very tedious process but it’s nice when you are printing 100-200 cards. Also P.S. my printer messed up a couple of times and I had to re-print some of the words by deleting the messed up prints. Sorting/aligning words and definitions and printing again.

I got a bit of help from the links below
Sources:
Changing layout of word document: https://www.youtube.com/watch?v=NI0MG05OojQ
Using Mailing merge document: https://smallbusiness.chron.com/merge-excel-data-word-documents-54185.html
Center text vertically: https://www.howtogeek.com/240521/how-to-center-text-vertically-on-the-page-in-microsoft-word/

1) Preparing the excel spreadsheet

  • Open a new spreadsheet and on sheet 1 place two columns with headers “front” and “back”
  • Now fill in the corresponding information for front on column 1 and back on column 1

2) Preparing the word document

  • File> New blank document
  • Layout>Page Setup>bottom right corner
  • Margins Tab
    • Change margins to 0.5″
    • change to landscape
  • Paper Tab
    • width: 8″
    • height 5″
  • Layout Tab
    • Change Page Vertical alignment to Center
  • Click OK

3) Import/Auto-fill with Excel words

Mailings Tab> star mail merge >Start Mail Merge> Step by step mail merge wizard
step 1 Select Document –>
Letters
step 2 Select Starting document –> use current document
step 3 Select recipients –> use and existing list and browse for excel sheet (with header in sheet one with one column)
step 4 Write your letter –> click on…more items and select column header and press insert
step 4b –> Now format the text size( ~100) and set align horizontally
step 5 Preview your letters –> Nothing really to change, click next
step 6 complete merge –> Click on “Edit Individual Letters” Merge records, select ALL
* Now fix any of the cards where the text is overflowing into the next card. Highlight and change text size to something smaller.

4) Print front of cards

  • Now you should be able to print these cards in the order they appear in the excel column
  • Note: Also there seems to be a error in the last card with it not being centered. Print a blank card at the end of the list.

5) Back Side

  • Repeat with Column 2 inserting “back” instead of “Front”
  • Generate another set of pages with the back text on all the cards. Font size should be about 30 depending on the index card size and amount of text.
  • Make a note of how your printer is printing relative to how you load the index cards into the paper feed
  • Load the cards in order of how you previously printed the words or the definitions won’t match up
  • Repeat this guide to create a set of cards with the definitions based on the excel sheet.