How To: Stop Android File Transfer from Launching Automatically

How To: Stop Android File Transfer from Launching Automatically

usb_android_smallAndroid File Transfer is a great tool for mac users! Unfortunately, it is annoying that it auto-launches when you plugin your phone. There is no setting to disable this feature in settings.

https://www.android.com/filetransfer/

Problem: Android File Transfer Auto Launches

Solution 1: Disable the process from starting up
Thanks to Giorgos for a better solution! ( see comments)

  • Go to “System Preferences”
  • Go to “Users & Groups”
  • Click on “Login Items”.
  • Select it from the list and click on the minus.

Solution 2: Internally disable app

  • Close Android File Transfer
  • Open Activity Monitor and kill “Android File Transfer Agent”
  • Go to where you installed “Android File Transfer.app” (I have it under /Applications)
  • Right click and –> “Show package contents”
  •  Within the Contents/Helpers folder you will find the Agent.
  • Rename “Android File Transfer Agent” to e.g. “Android File Transfer Agent_DISABLED
  • Then go to “/Users/username/Library/Application Support/Google/Android File Transfer” and again rename the Agent app.. “Android File Transfer Agent_DISABLED”.

Source:
https://mtmurdockblog.com/2012/12/17/disable-auto-start-for-android-file-transfer-on-osx/

How To: Change the Volume Sound on El Capitan

volumeThe new El Capitan sound volume indicator sounds very hollow and empty to me. I hate it. So I found  a way to change it.

  • Step 1) Disable SIP
    • Reboot your computer and hold CMD + R
    • Top menu bar, click on Utilities> Terminal
    • Type csrutil disable and press enter
    • Reboot
  • Step 2) Navigate to: /System/Library/LoginPlugins/BezelServices.loginPlugin/Contents/Resources
    • Rename original file to volume_original.aiff
    • Copy and paste attached file into that folder, typing in your password as needed
  • Step 3) Reboot


Volume File: volume.aiff

Sources:
Disable SIP: https://www.youtube.com/watch?v=7Dgg5XAYMXI
Change Notification Sound: https://www.youtube.com/watch?v=vOQOcCISgMI
File: http://forums.macrumors.com/threads/can-you-change-the-new-yosemite-volume-indicator-sound.1767911/


Obtaining, Creating a Bootable Drive and Reinstalling Mavericks

mavericks
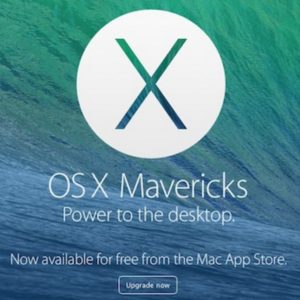
I’m in the process of upgrading a white macbook (A1342 Late 2009) to have an SSD, and because El Capitano appears to have lots of bugs/problems, and aesthetics are pretty bad I’ve decided to install Mavericks. Below are the steps I used/followed. Feel free to ask any questions!

Obtaining and Creating the Bootable USB Drive

1) If you have the “OS X Mavericks Installer.app” file provided follow steps on this link
https://support.apple.com/en-us/HT201372

2) If you are able to find the Disk Image (“Mavericks Installer.dmg” ~5.32GB)
Source: User lueyluey  on this site.
http://getintopc.com/softwares/operating-systems/mac-os-x-mavericks-free-download/
OR https://www.youtube.com/watch?v=wUz0ak2daUE

1- Download the mavericks DMG from Source Website.
2- Insert a USB drive (i used 8GB)into the Mac and launch Disk Utility
3- Click on the USB drive from the left-hand menu and select the Partition tab
4- Click the drop-down menu, selecting 1 partition
5- For format select Mac OS Extended (Journaled)
6- Options select GUID partition then click apply
7- With disk utility open, choose the base system.dmg, go up to image menu, “scan image for restore”
8- Go back to Disk Utility window and click on the newly formatted USB Drive in the menu(sub-directory drive), then click on the Restore tab (or Edit>Restore in El Capitano)
9 – Drag/Select the Mavericks Installer.dmg over to the Source text box. For Destination, drag and drop the partition created on the USB drive onto the textbox and click restore.
10- Restart OS X holding “option” key.
11- Choose USB Drive that matches your installer (e.g. Mavericks Installer.dmg) .

Read more

Farsi Takari

Very tasty dish that is easy to make! Goes great with roti, rice or naan!

INGREDIENTS

  • 1 Tbsp mustard seeds
  • 24oz cooked winter squash (Birds Eye brand)
  • 1 medium yellow onion
  • 2-3 gloves of garlic minced
  • 3/4 tsp cumin
  • 1 tsp turmeric
  • 3/4 cup frozen peas
  • olive oil
  • 1 tsp salt
  • 3/4 Tbsp brown sugar(optional)

Read more

How To: Enter Recovery Mode with Android (Moto G)

Pre-5.0 Android 

  1. Shut down phone
  2. Hold Power  and Volume Down(-) buttons for about 10 seconds
  3. Select Recovery
  4. When you see the dead android with a triangle and exclamation mark Press and hold Power and Volume Up(+) buttons for two seconds then release (holding too long with reboot the device)
  5. You will now see the recovery menu

Android 5.0 and above (Lollipop and above) 

  1. Shut down phone
  2. Hold Power  and Volume Down(-) buttons for about 10 seconds
  3. Select Recovery
  4. When you see the dead android with a triangle and exclamation mark Press and hold the Power for two seconds and while still holding the power button, click the Volume Up(+) button.
  5. You will now see the recovery menu.


Sources:

http://forum.xda-developers.com/moto-g/general/lollipop-stock-recovery-how-to-enter-t2964477

How To: Fix ClassNotFoundException on Android Eclipse

Problem: class not found exception

  • ClassNotFoundException


Solution

  • Add support library v4 and v7 to libs folder
  • Right click on libraries and “add to build path”
  • Make sure they are checked in the build path order and Export window

Sources: 

  • http://stackoverflow.com/questions/17851515/the-hierarchy-of-the-type-activity-is-inconsistent-when-extending-actionbaractiv
  • http://stackoverflow.com/questions/10866431/android-activity-classnotfoundexception-tried-everything

How To: Fix The Bluetooth Audio on Android Lollipop 5.1 From Skipping

Problem:AwesomePlayer
Soon after upgrading to Lollipop 5.1 on my Motorola g xt1031. I noticed that my car’s bluetooth receiver began skipping.

UPDATE 5/24/2017: There is no fix, skipping still continues, although less frequent. Rebooting fixes it temporarily.

Solutions:

  • Revert back to the old music player.
    • Steps:
      • 1) Enable Developer Mode (Settings–>About Phone–> Tap “Build Number” until give access)
      • 2) Press back and you should now see a “Developer Options” menu item near the bottom of the settings screen.
      • 3) Enable “Use AwesomePlayer”
      • 4) Enjoy Skip Free Audio!
  • Other things I tried:
    • Clearing the cache and  data from the bluetooth process
    • Re-pairing my phone to my car’s stereo

Read more