
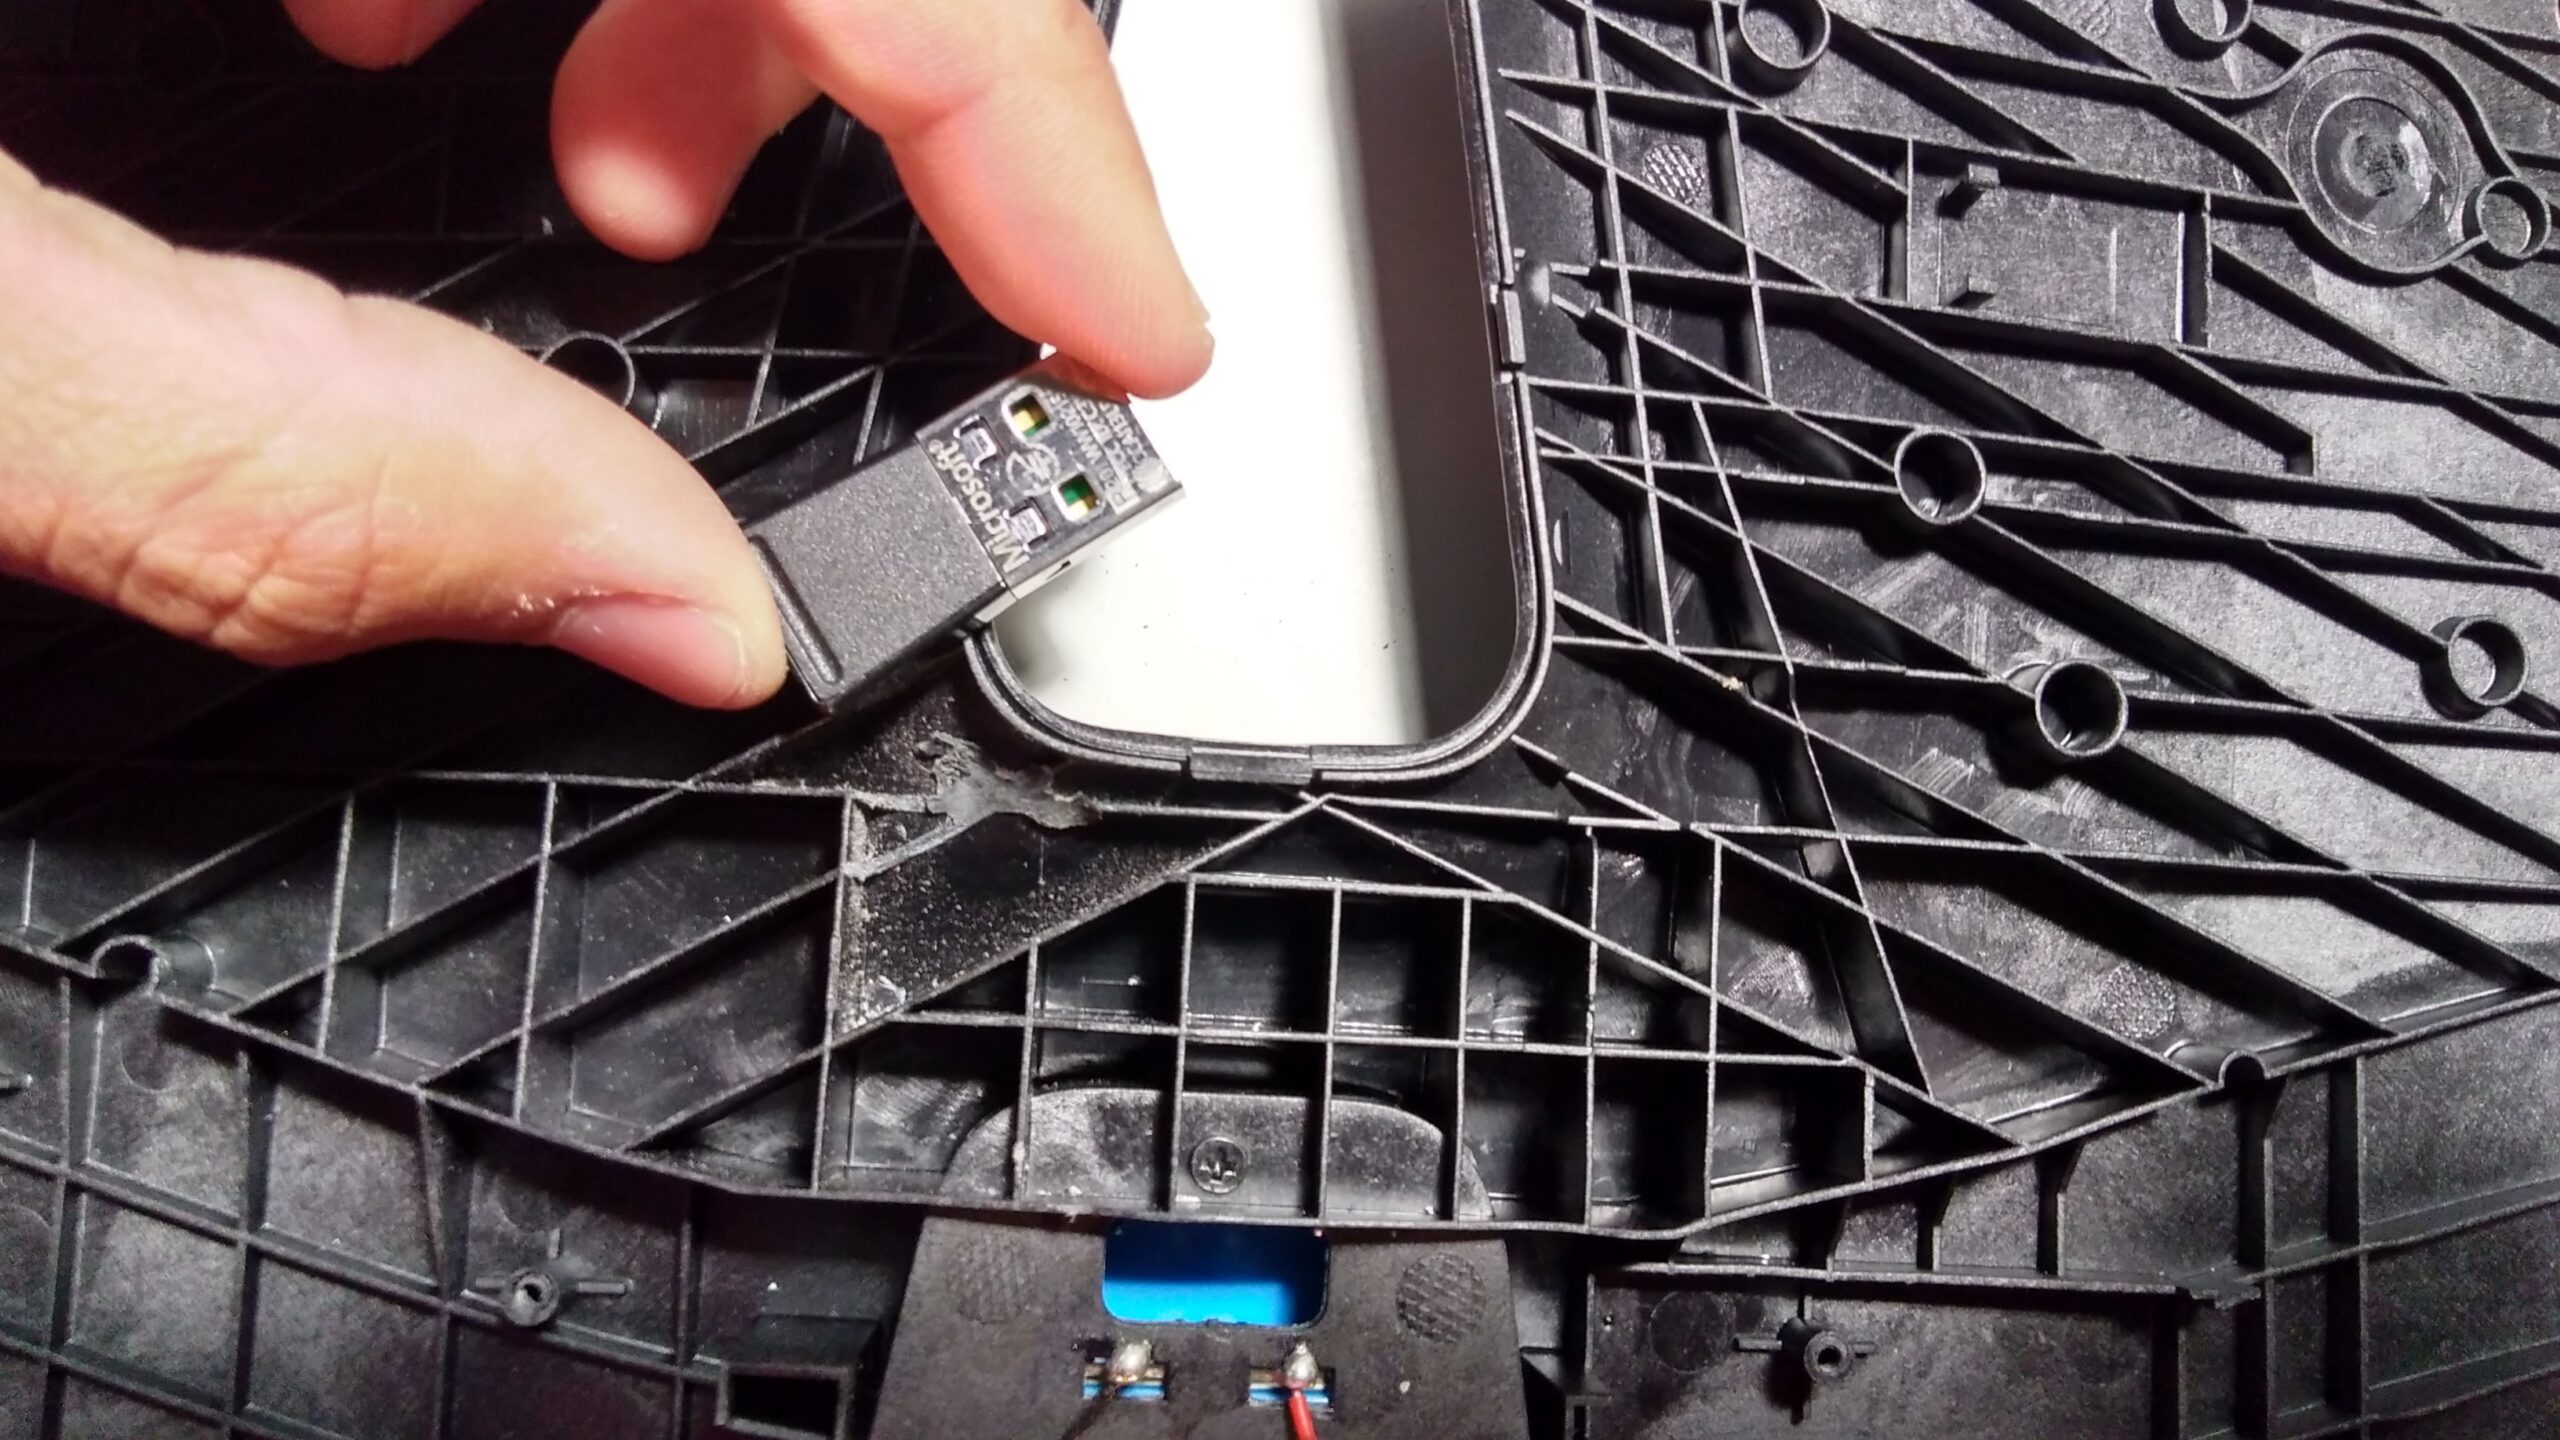
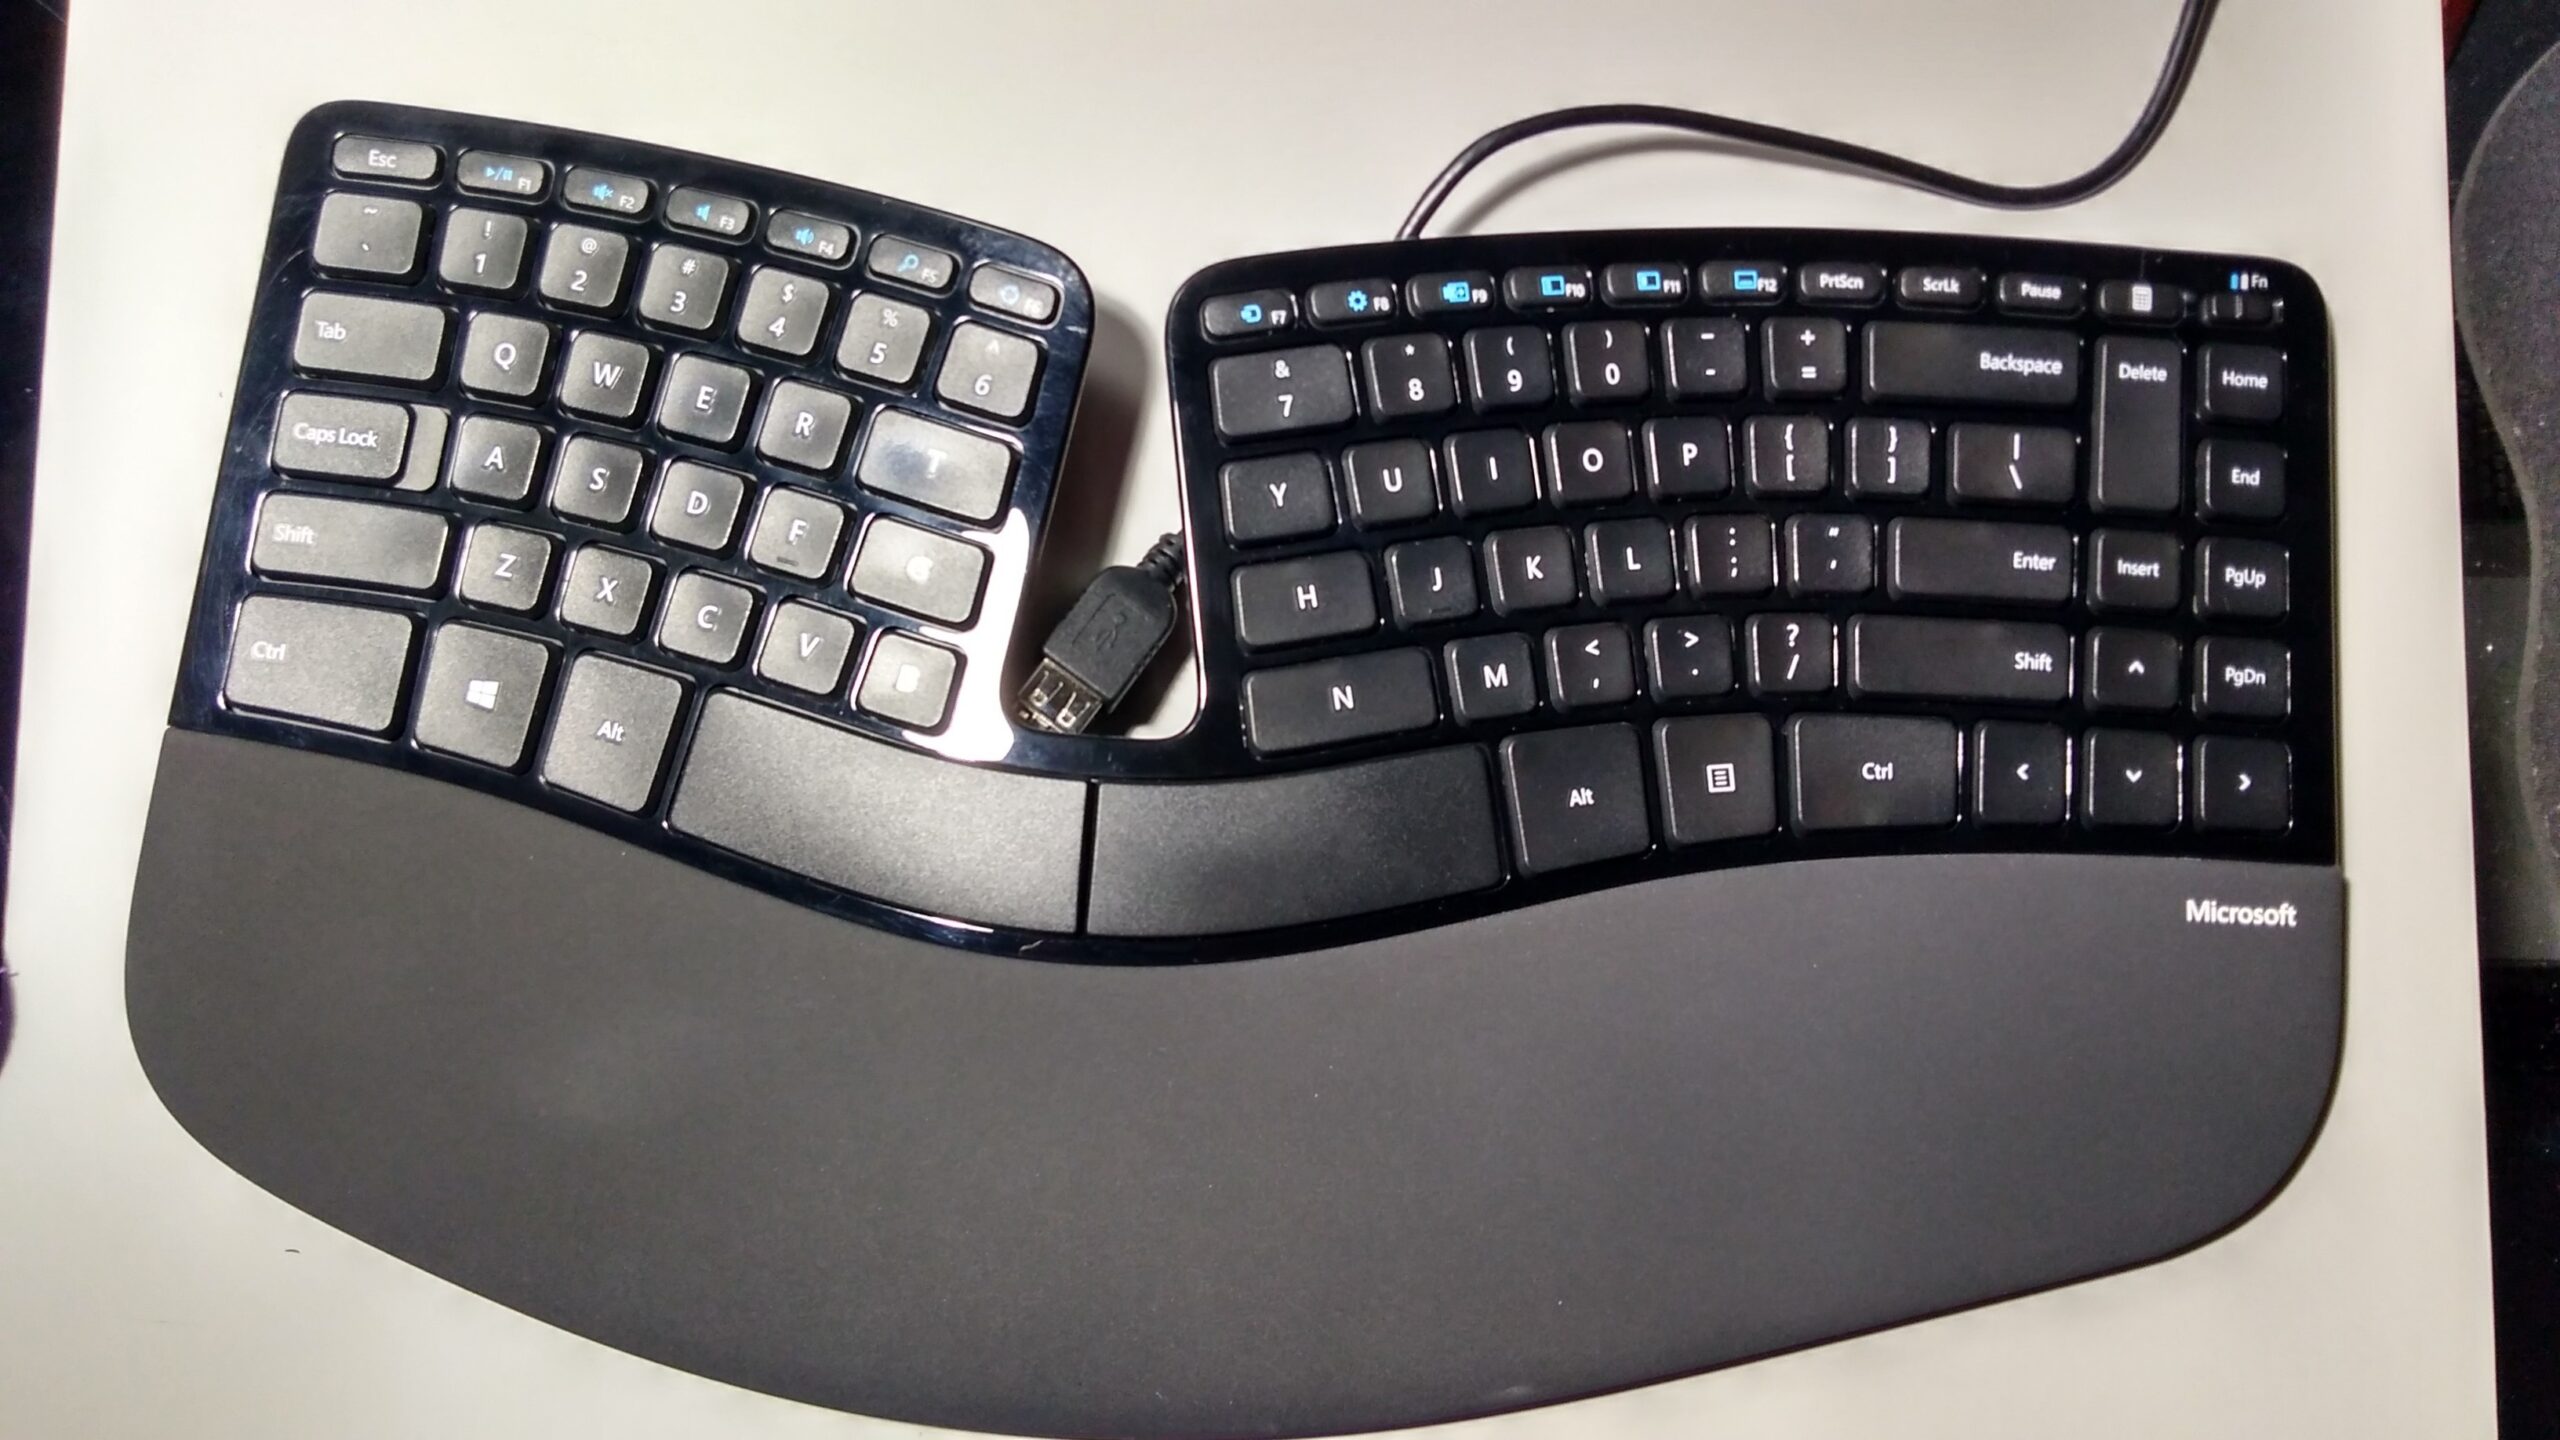
I could not find any tutorials on how to disassemble this keyboard so I thought I’d take pics along the way to disassembling mine. I also decided to make it wired (still with the dongle!!) because I realized that if you lose the dongle, there is no way to replace it and you need to spend another $70 on a new keyboard !!! So I decided to hide it in the body of the keyboard, and that way I will never risk losing it!
Disclaimer: Follow these instructions at your own risk, I am not responsible for any broken keyboards or damage incurred in the process
Tools used:
- Screw driver
- Plastic prying tool or guitar pic
- Dremel to make the hole
- Safety glasses for dremel use
- Courage to risk breaking the keyboard
Steps:
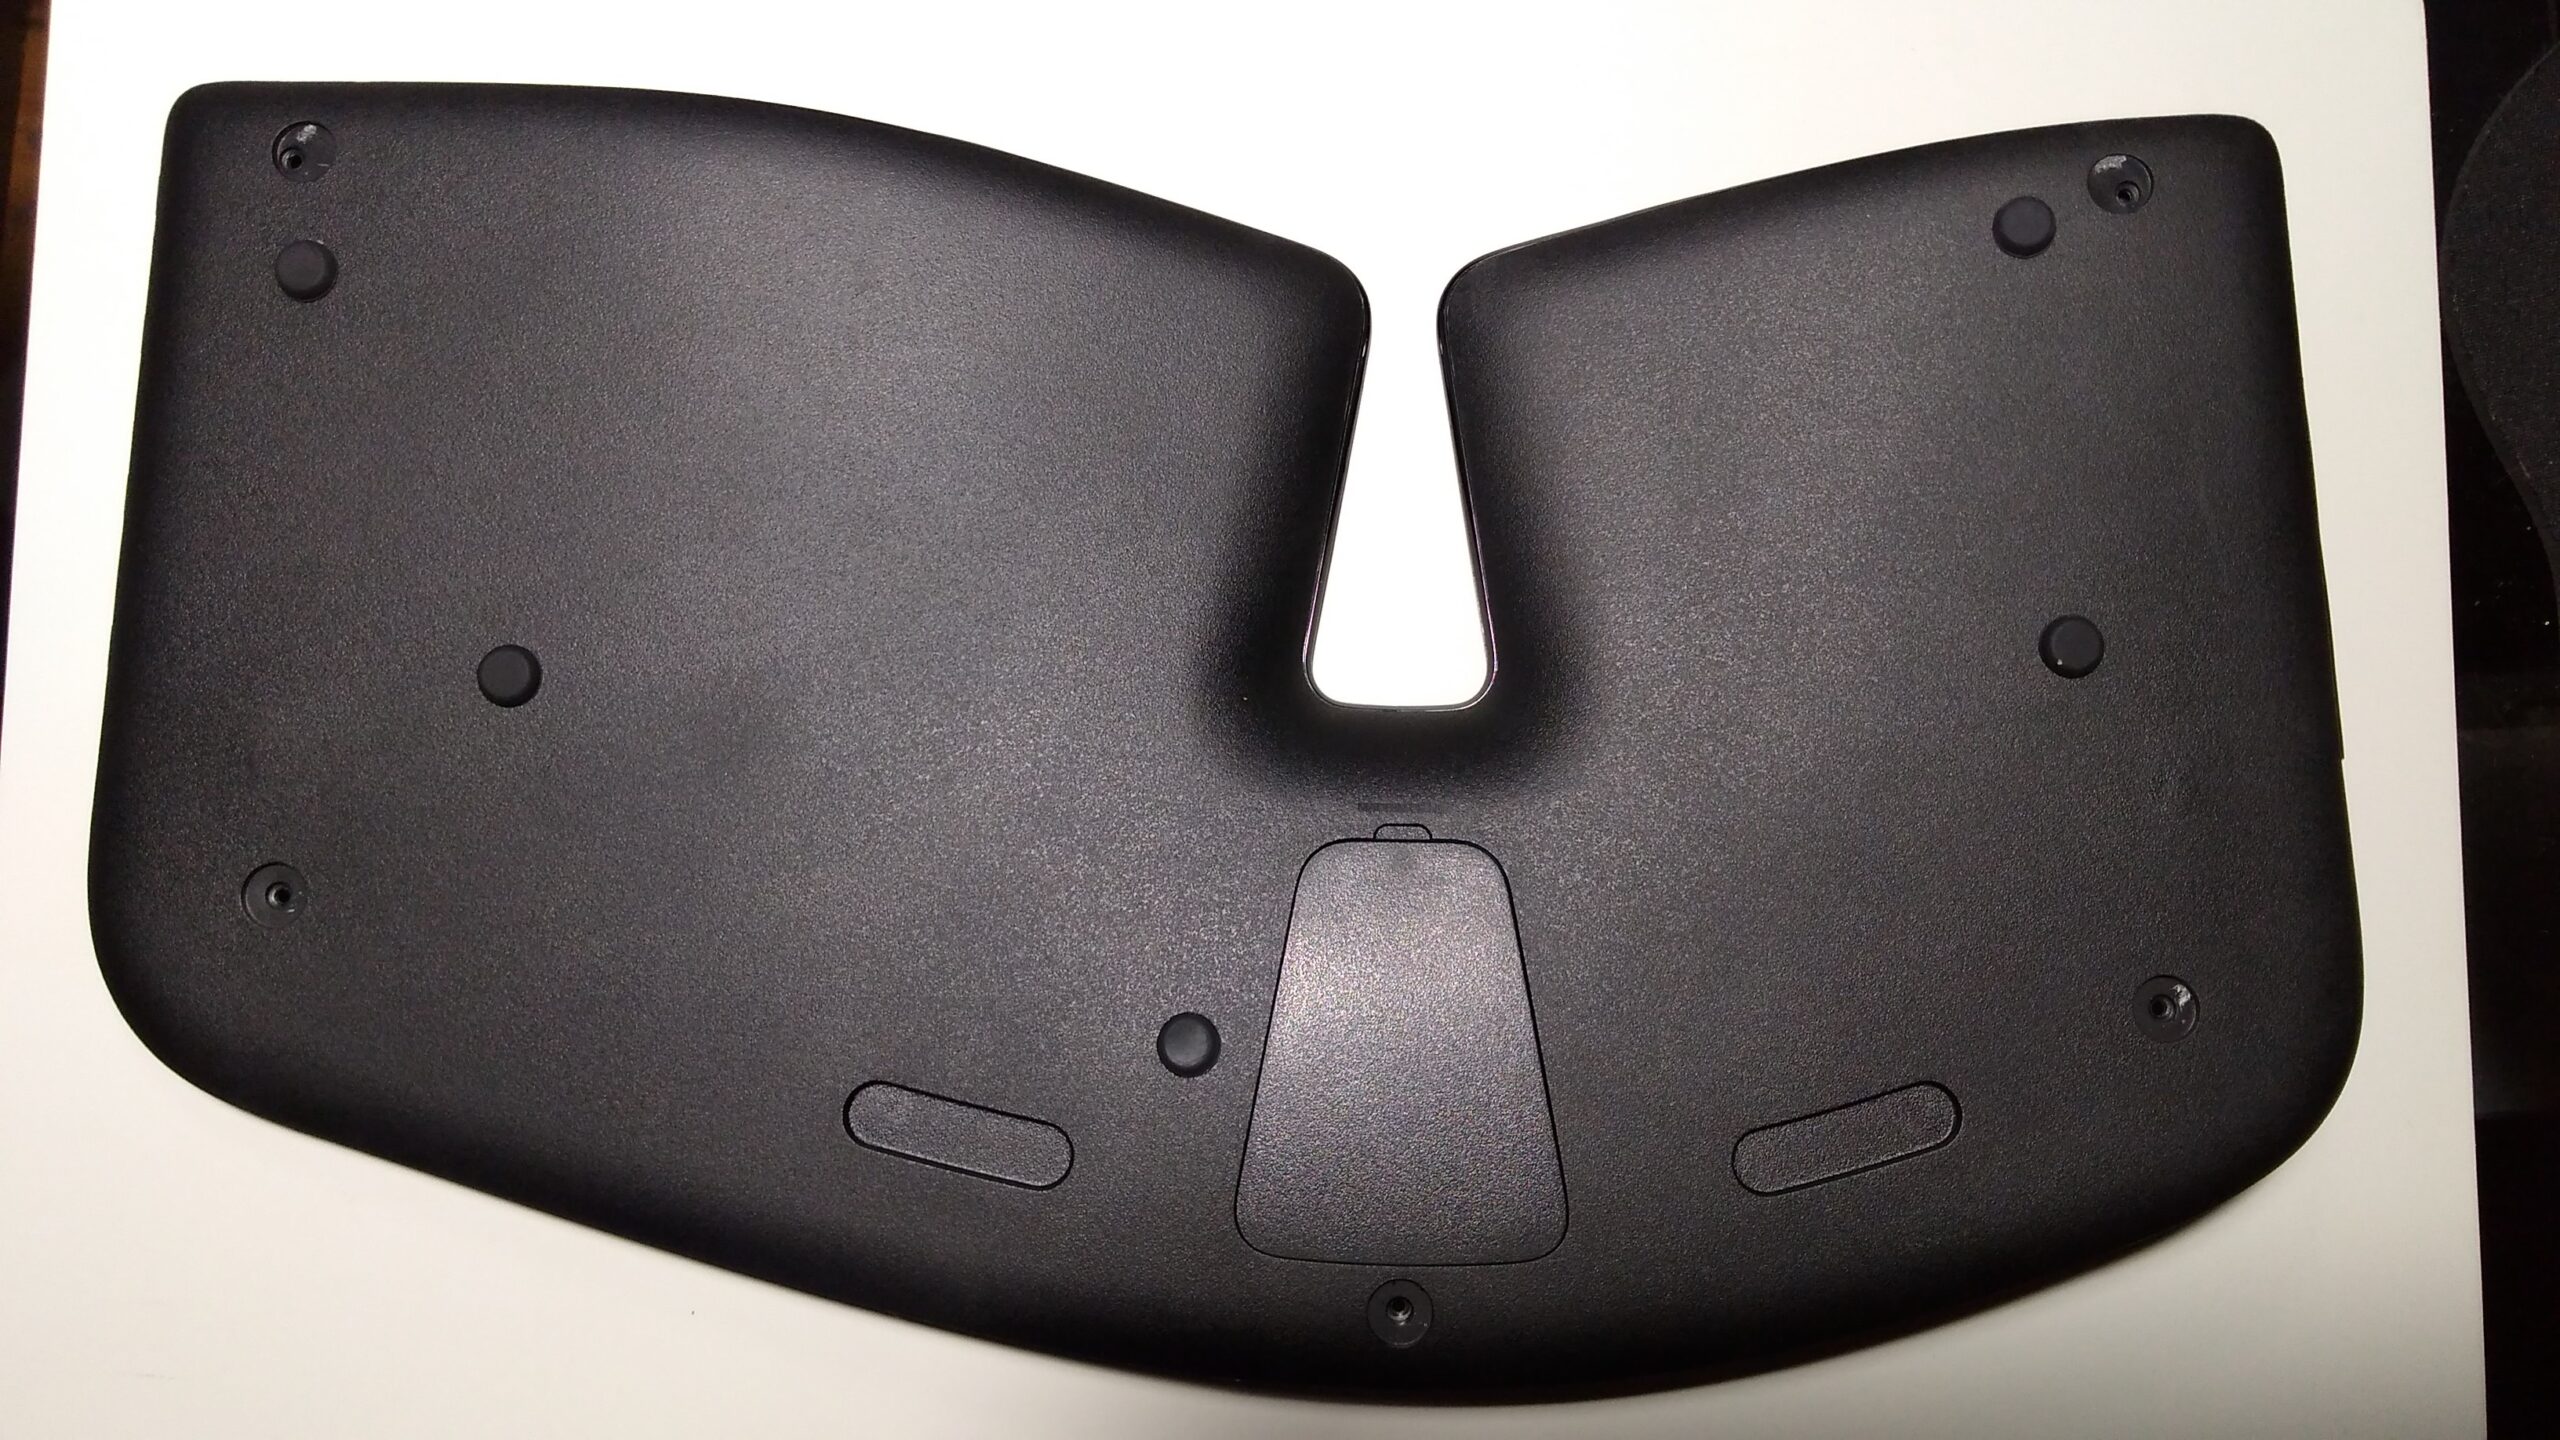
- Remove all screws from under the keyboard, they are all under the feet
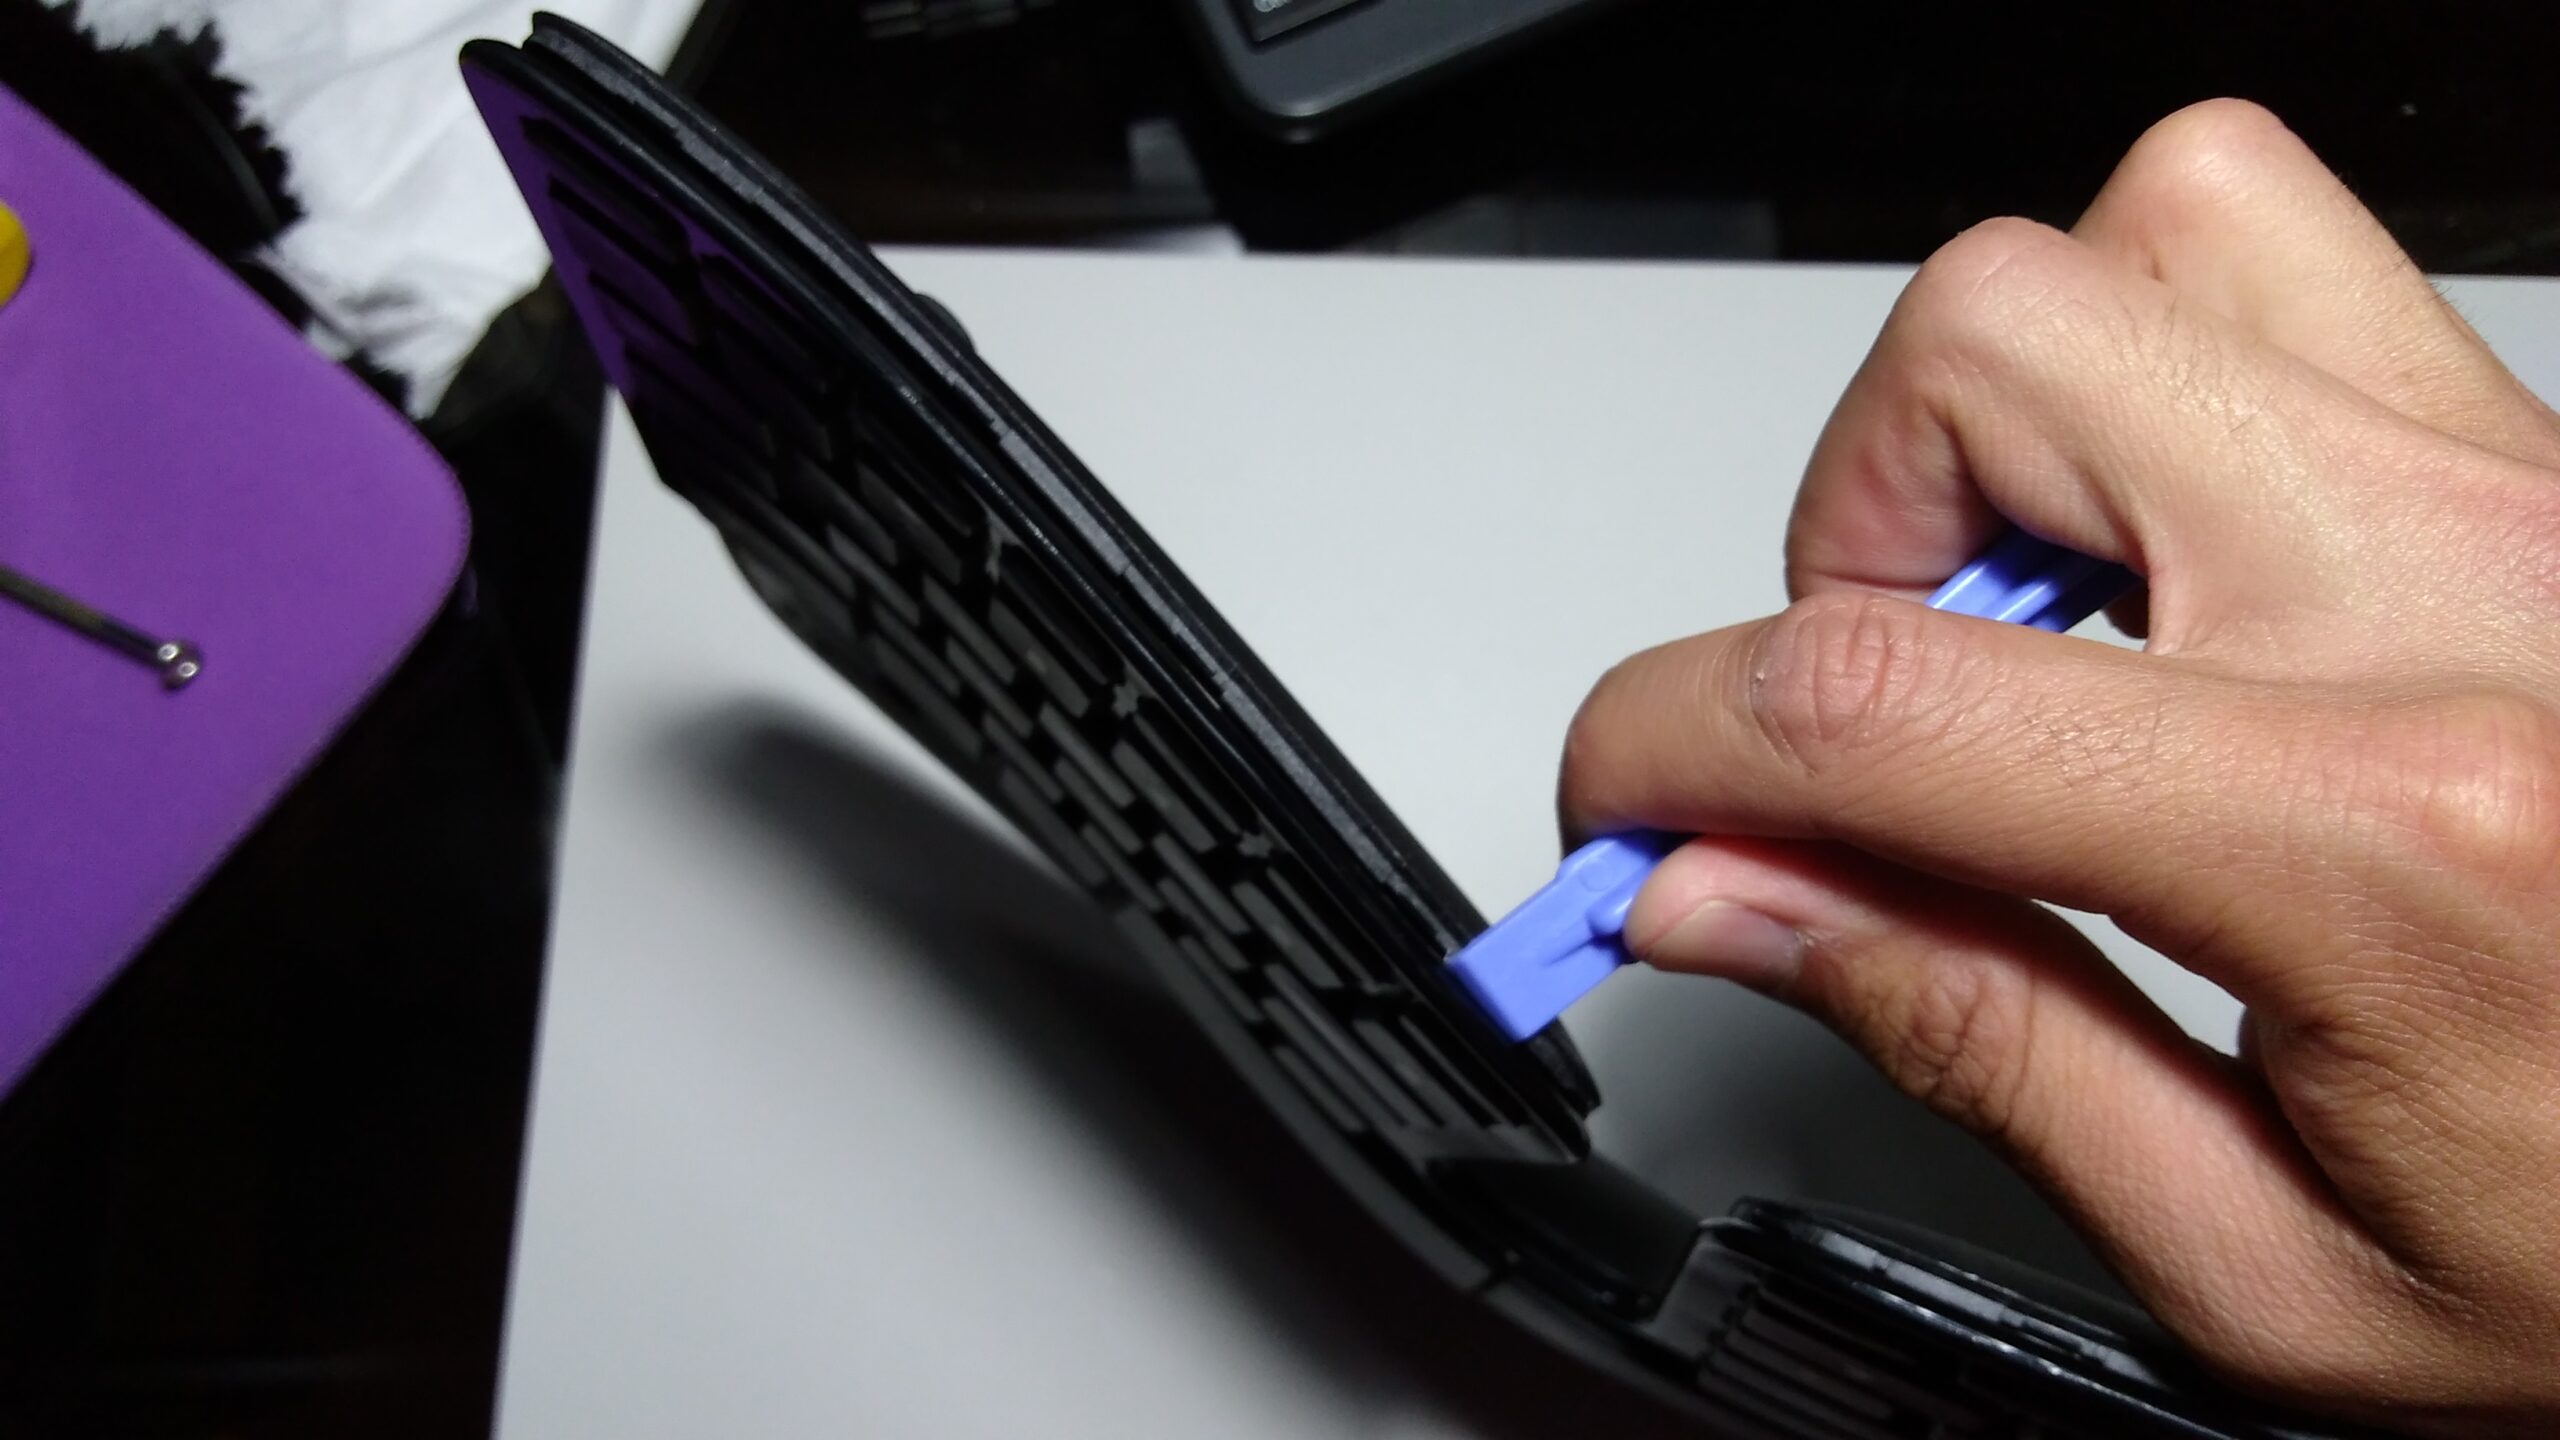
- Use a plastic tool to free up the palm rest, start on the sides and make your way to the middle.
- Note! You may need to stick a screw driver to free up some clips near the middle of the palm rest
- Remove all screws under the palm rest
- Note! all palm rest screws and top two on the keyboard are different than the bottom three
- Use a plastic tool to release the clips around the keyboard. Start on the sides. Turn the tool as if it was a key to release the clips. It was difficult around the middle of the keyboard.
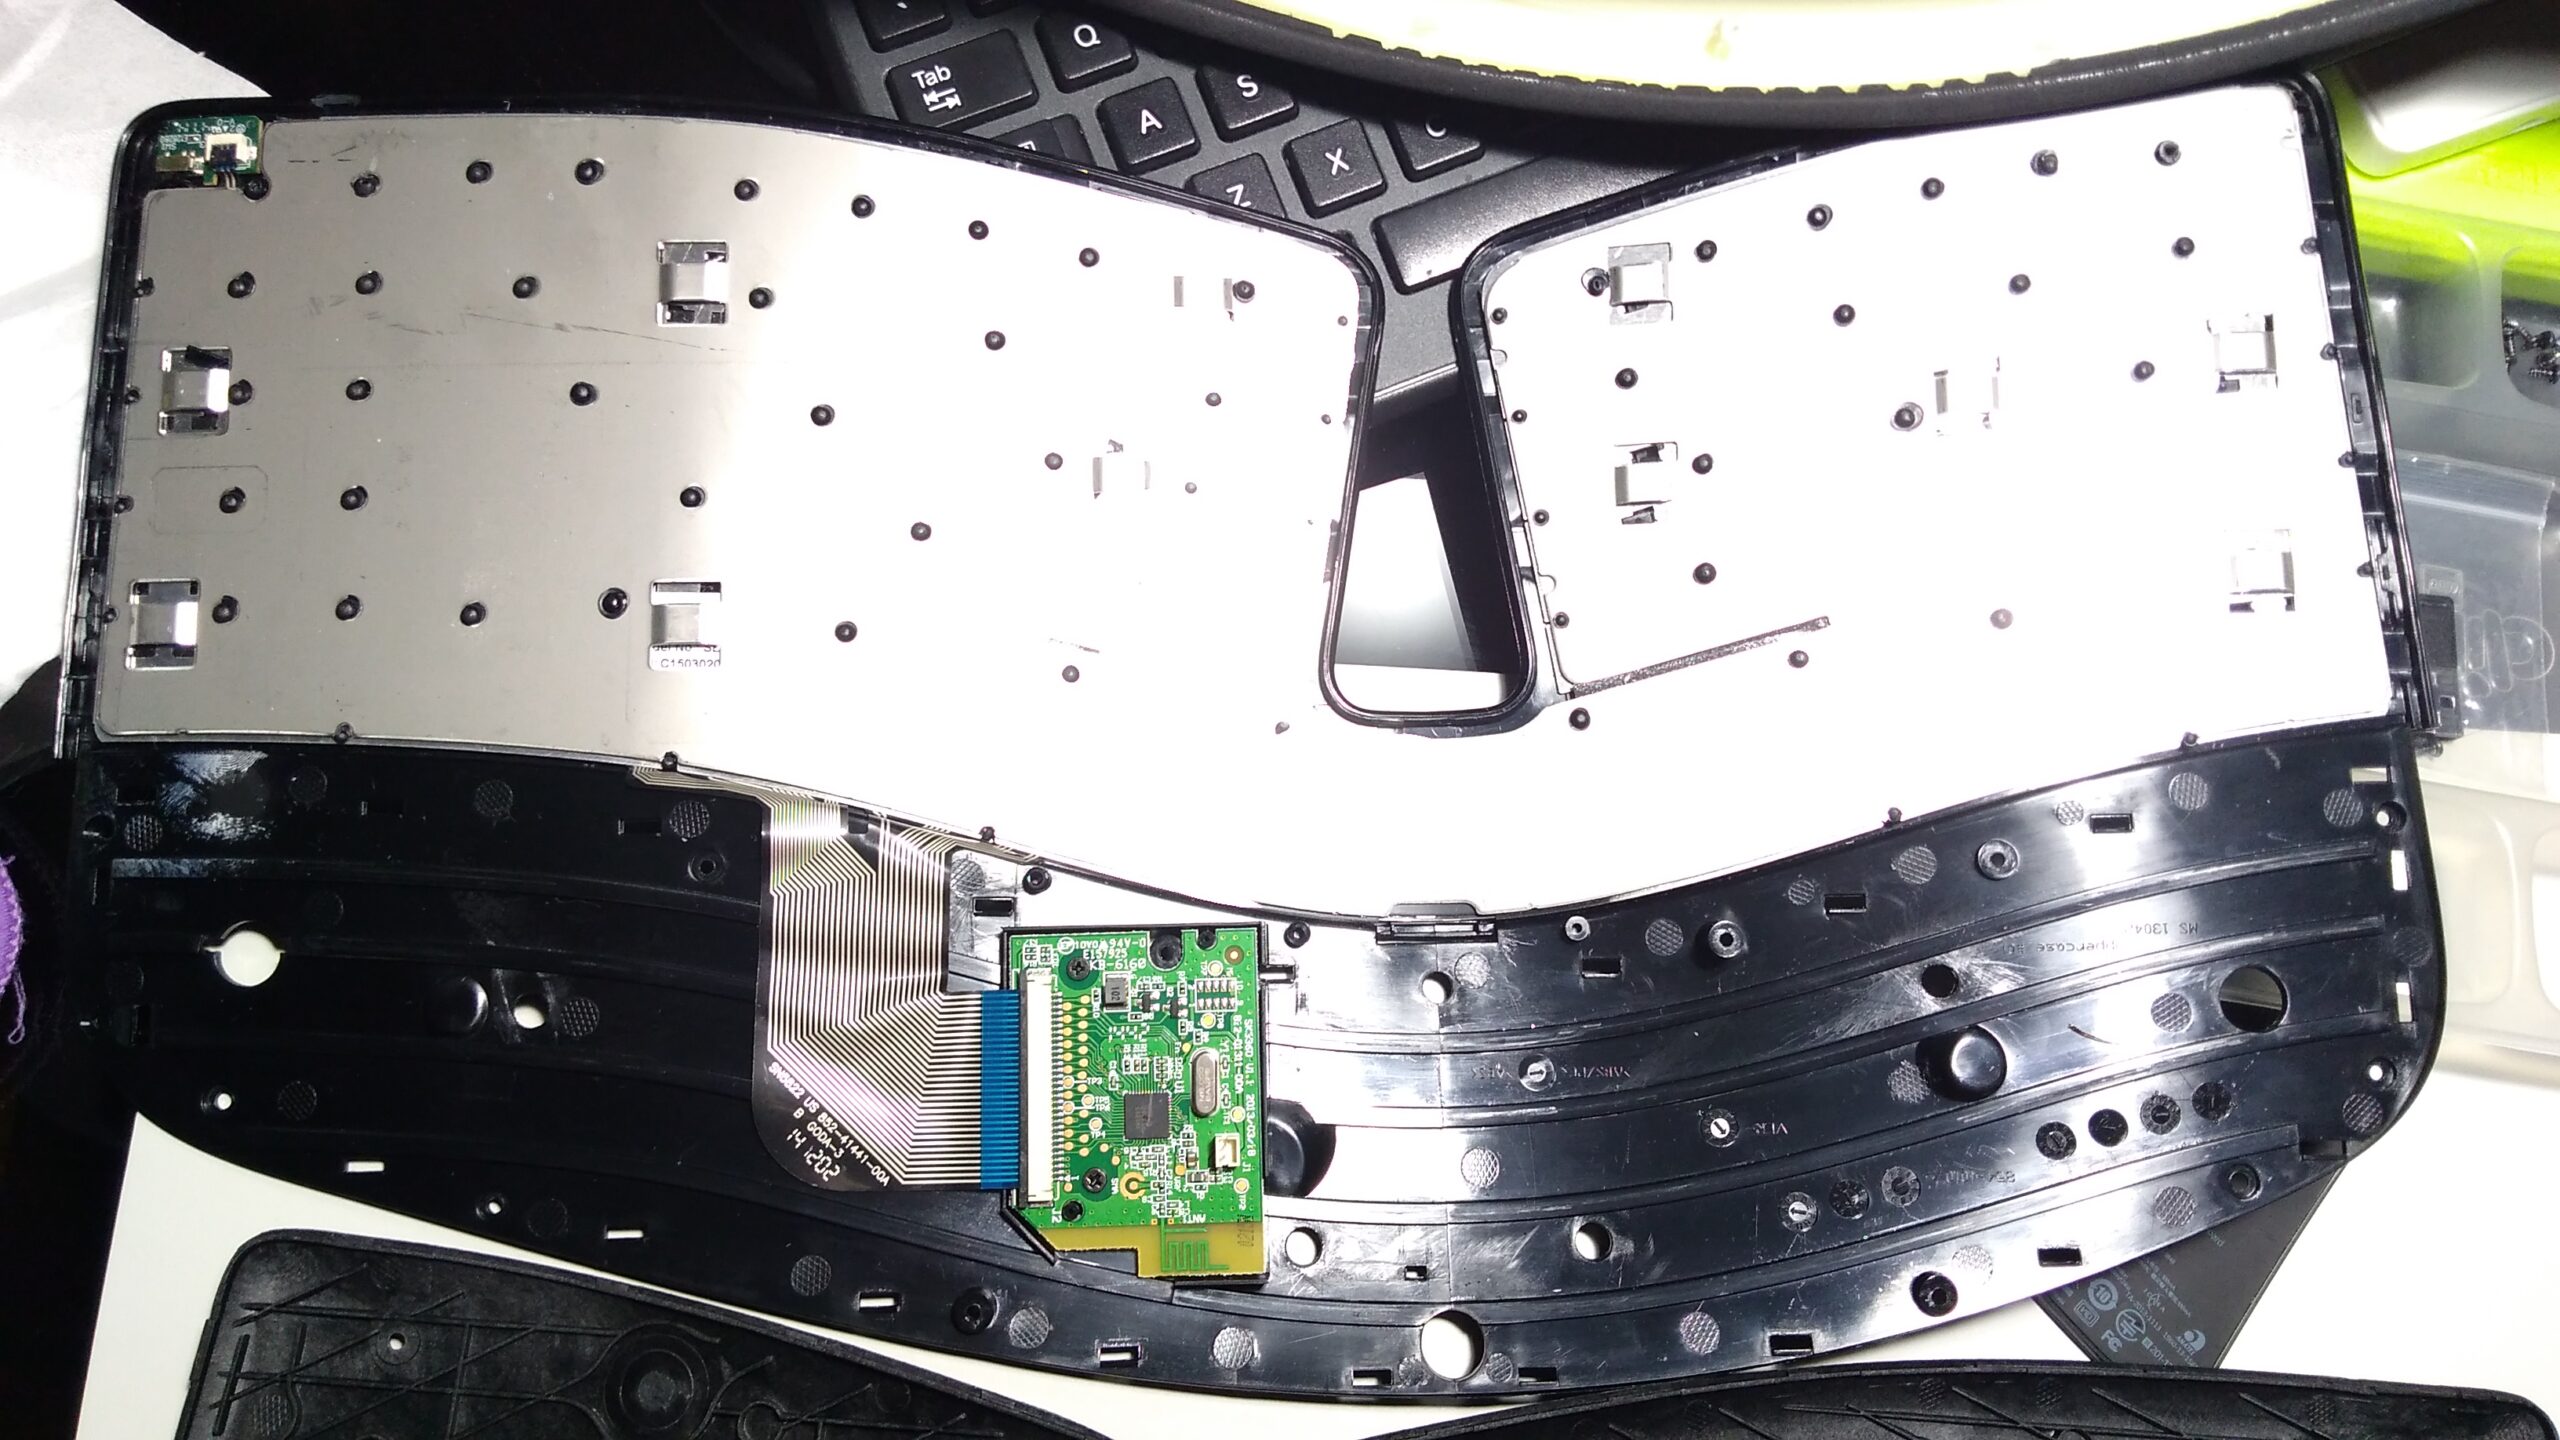
- Once removed unclip the battery connector!! Be careful not to break the wires!
Now you are done!
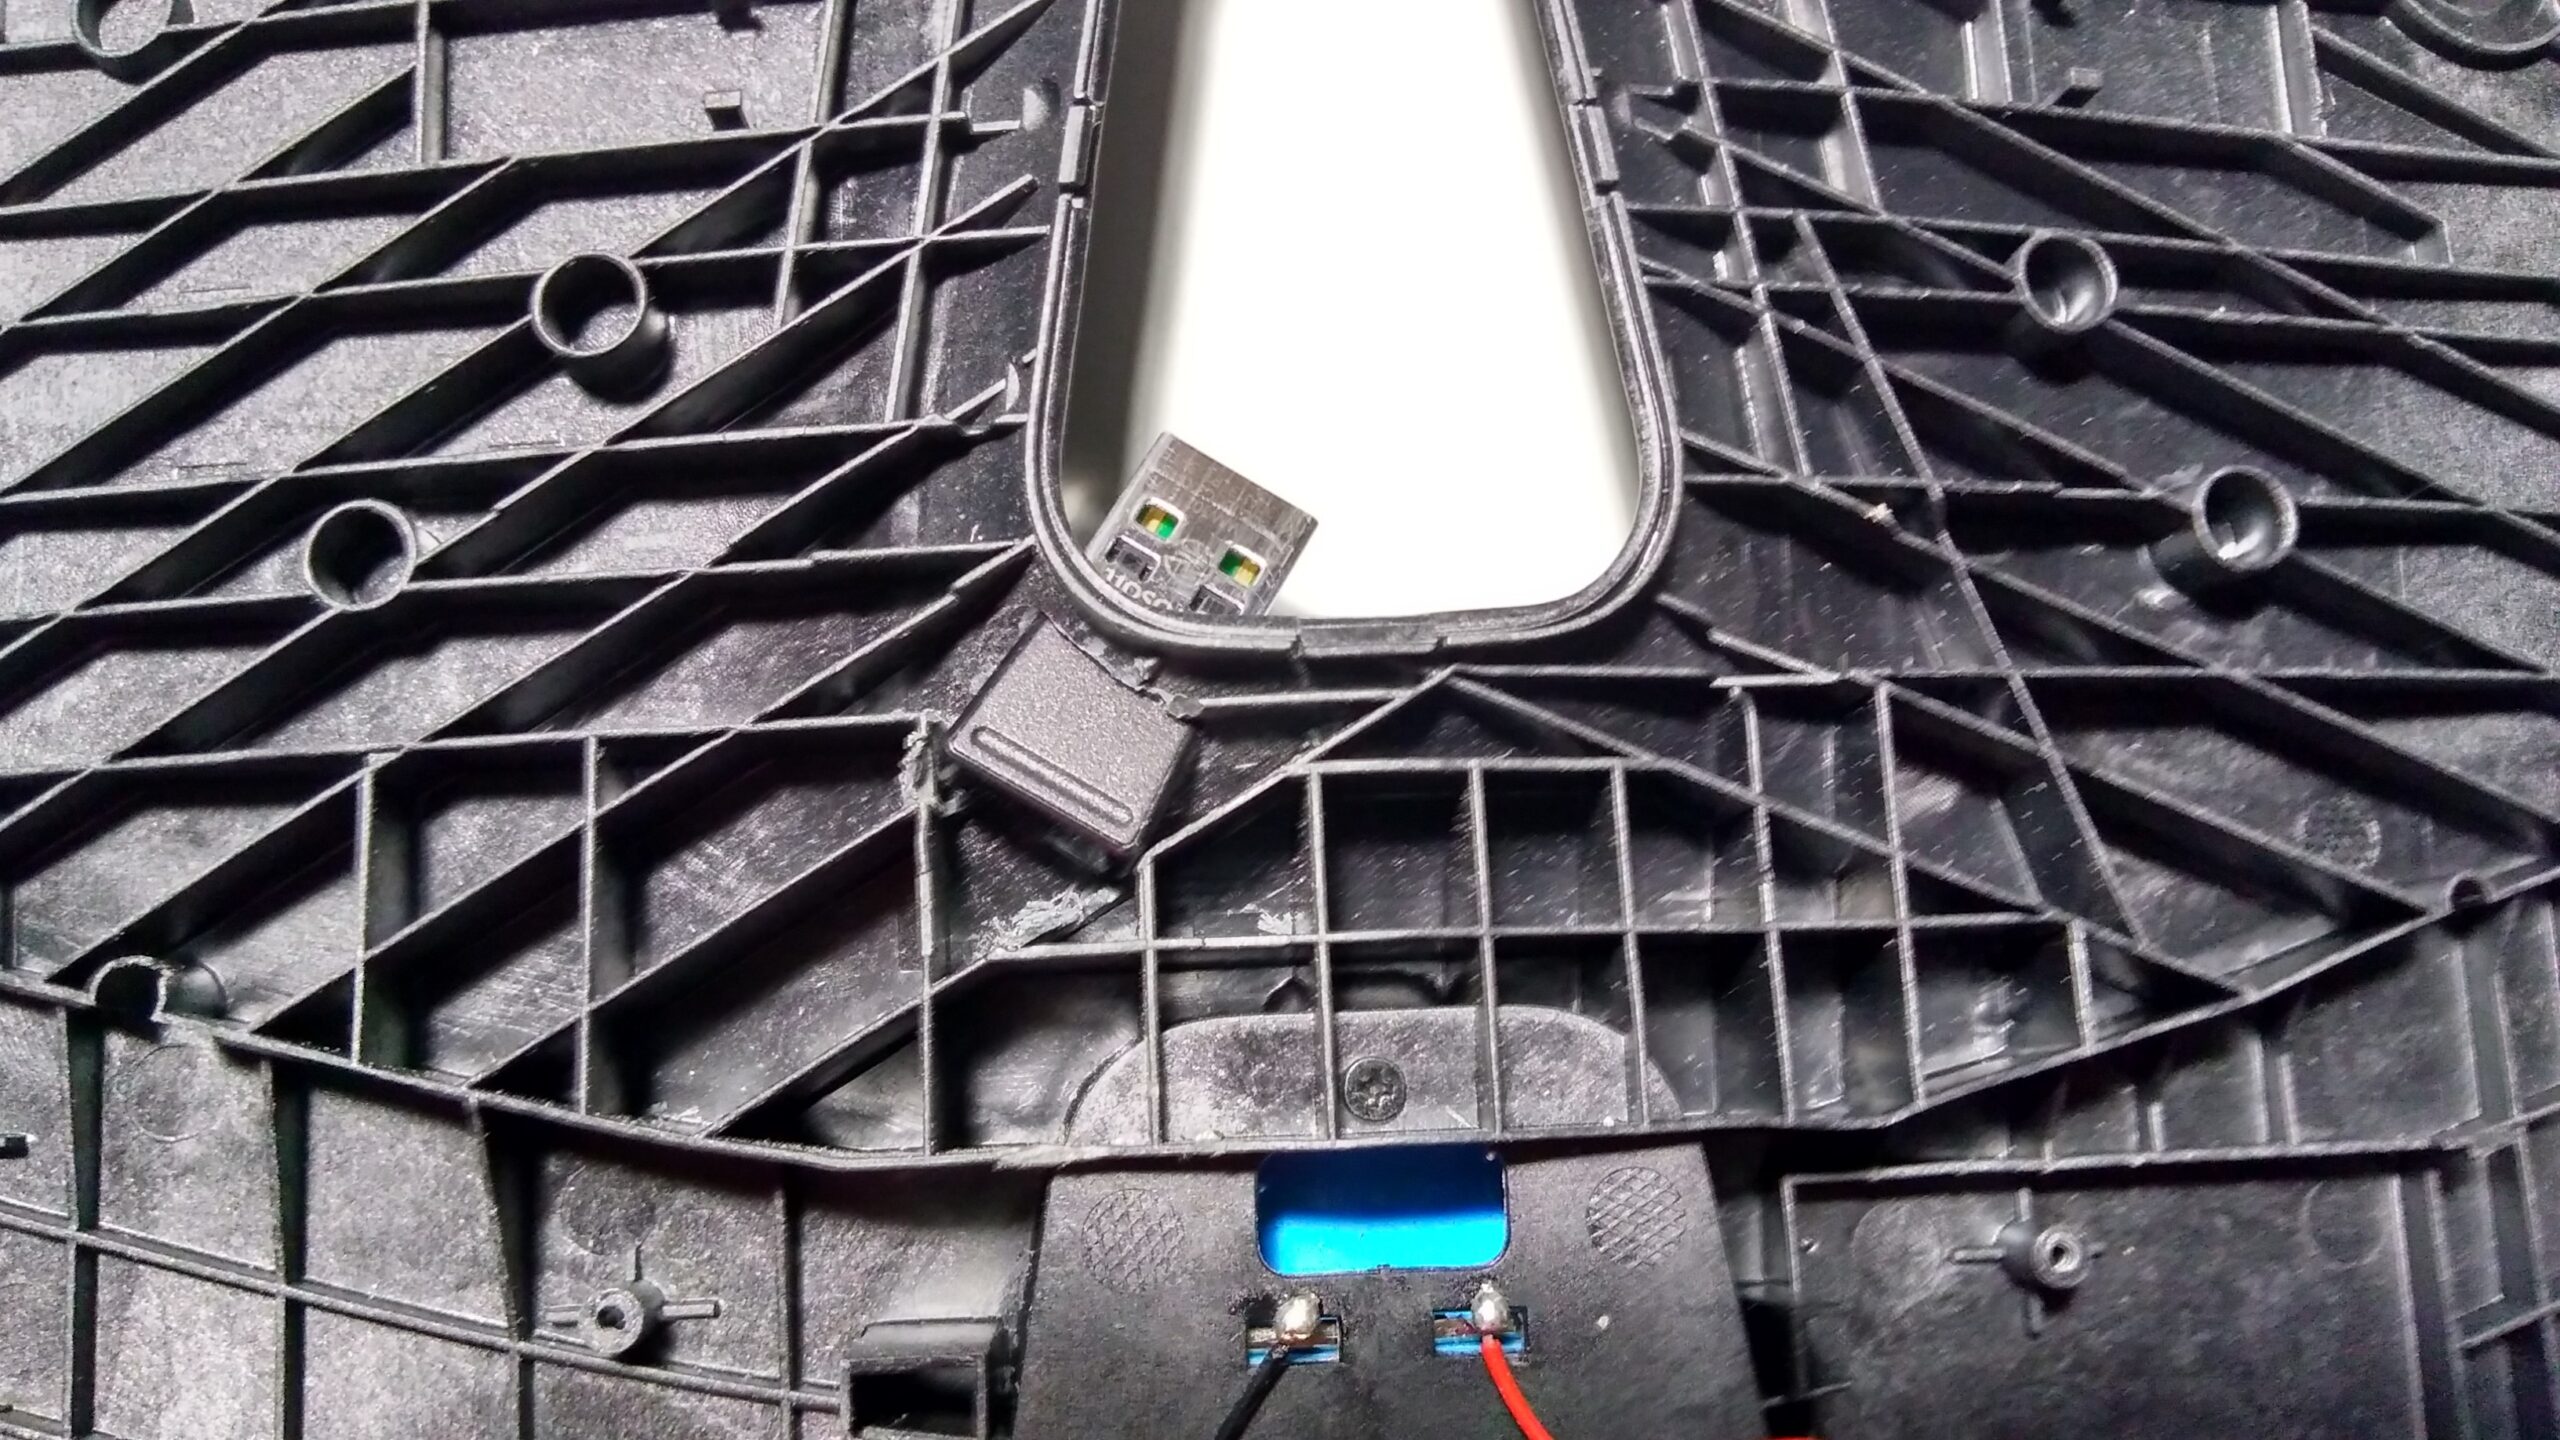
I am also showing how I stuck the receive inside the keyboard so that I would not have to worry about losing it.
Hope you guys found this useful!
Custom PCB Development Efforts
Since this article was posted, there have been efforts to make an actual wired sculpt by creating a custom pcb’s for this keyboard.
- Maarten has been working on a custom pcb board based in a Teensy 2.0. He sent me a prototype version which has been working well so far! I made a video of the assembly process. The future plans are to have it all be pre-assembled for distribution.
- Repository holding PCB files. hex files for teensy 2.0 and flash utility: https://github.com/metalshreds/wired_sculpt
- PCB video Assembly: https://www.youtube.com/watch?v=UfdX_Ma_ZEI
- You can email Maarten if you are interested in getting a prototype version to try! sculpt2wire -add- gmail – com
- Chad Austin has a great detailed write up on his custom pcb design, definitely worth a read! He has also posted the pcb design, and parts list on github for anyone interested in making their own.


Custom PCB for Sculpt
Hi Emmanuel, do you have a big photo of PCB used in this keyboard? Or maybe you know which controller used in it?
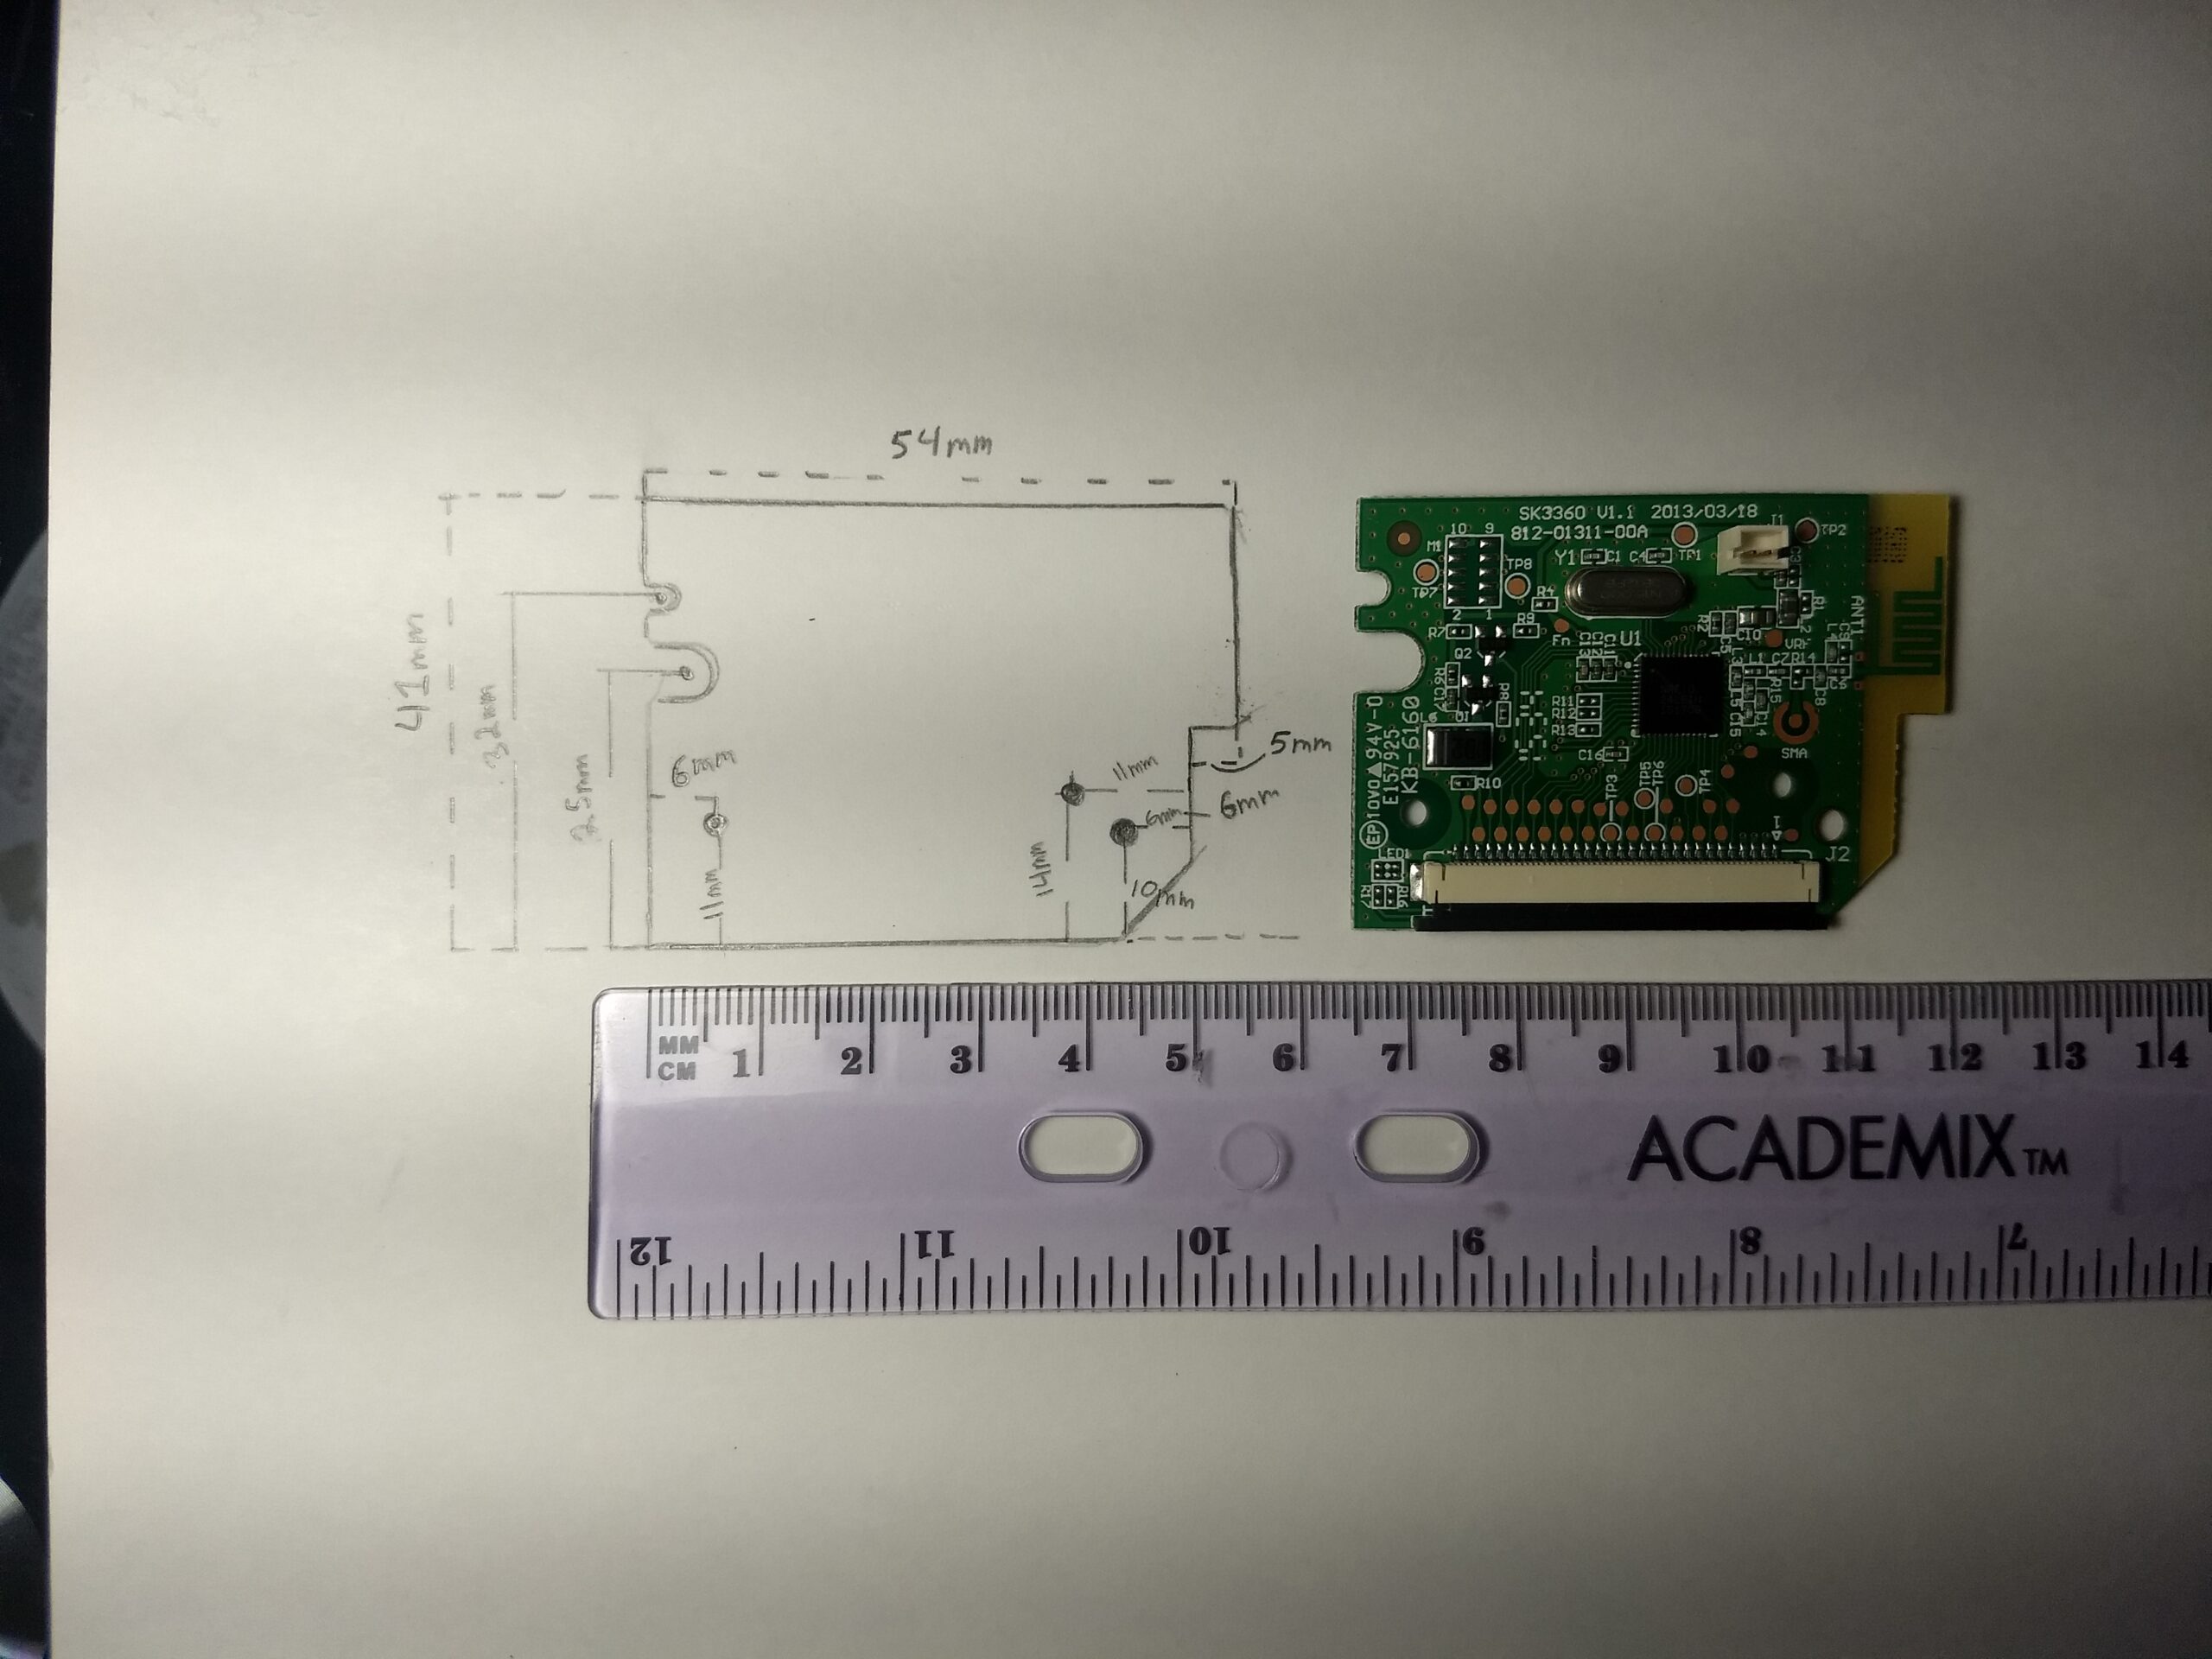
I just attached a new photo of the controller board, do you think it would be possible to make it wired without the dongle?
I’d rather try to make it bluetooth compatable. I worked with keyboard for two years and never disassembled it.
Abour wired version: it should be easier. Guys who do Ergodox keyboard are using opensourced firmwares. I think it is possible to reverse engenier how keys connector is attached to pcb and create the same one but with your own controller
Emmanuel, thank you for sharing this photo 🙂
Here is controller used in keyboard:
http://www.nordicsemi.com/eng/Products/2.4GHz-RF/nRF24LE1
In new version of this keyboard(grey one) Microsoft uses the same manufacture NordicSemiconductor.
Here are firmwares i’ve mentionedearlier:
https://github.com/tmk/tmk_keyboard?files=1
Ergodox uses qmk
Maybe this will help
https://github.com/blttll/tmk_keyboard/blob/master/keyboard/sculpt/README.md
Thanks for the links! Definitely would be an awesome project, will have to look into it when I have more time 🙂